Selected work · 04 / Design & build
Yagna Pavilion
A permanent place for havan, Agnihotra, and gathering together.
What began as a fire altar and an open platform became a roofed space, built over several seasons with my father. Each version taught us what the next one needed.
Follow the build ↓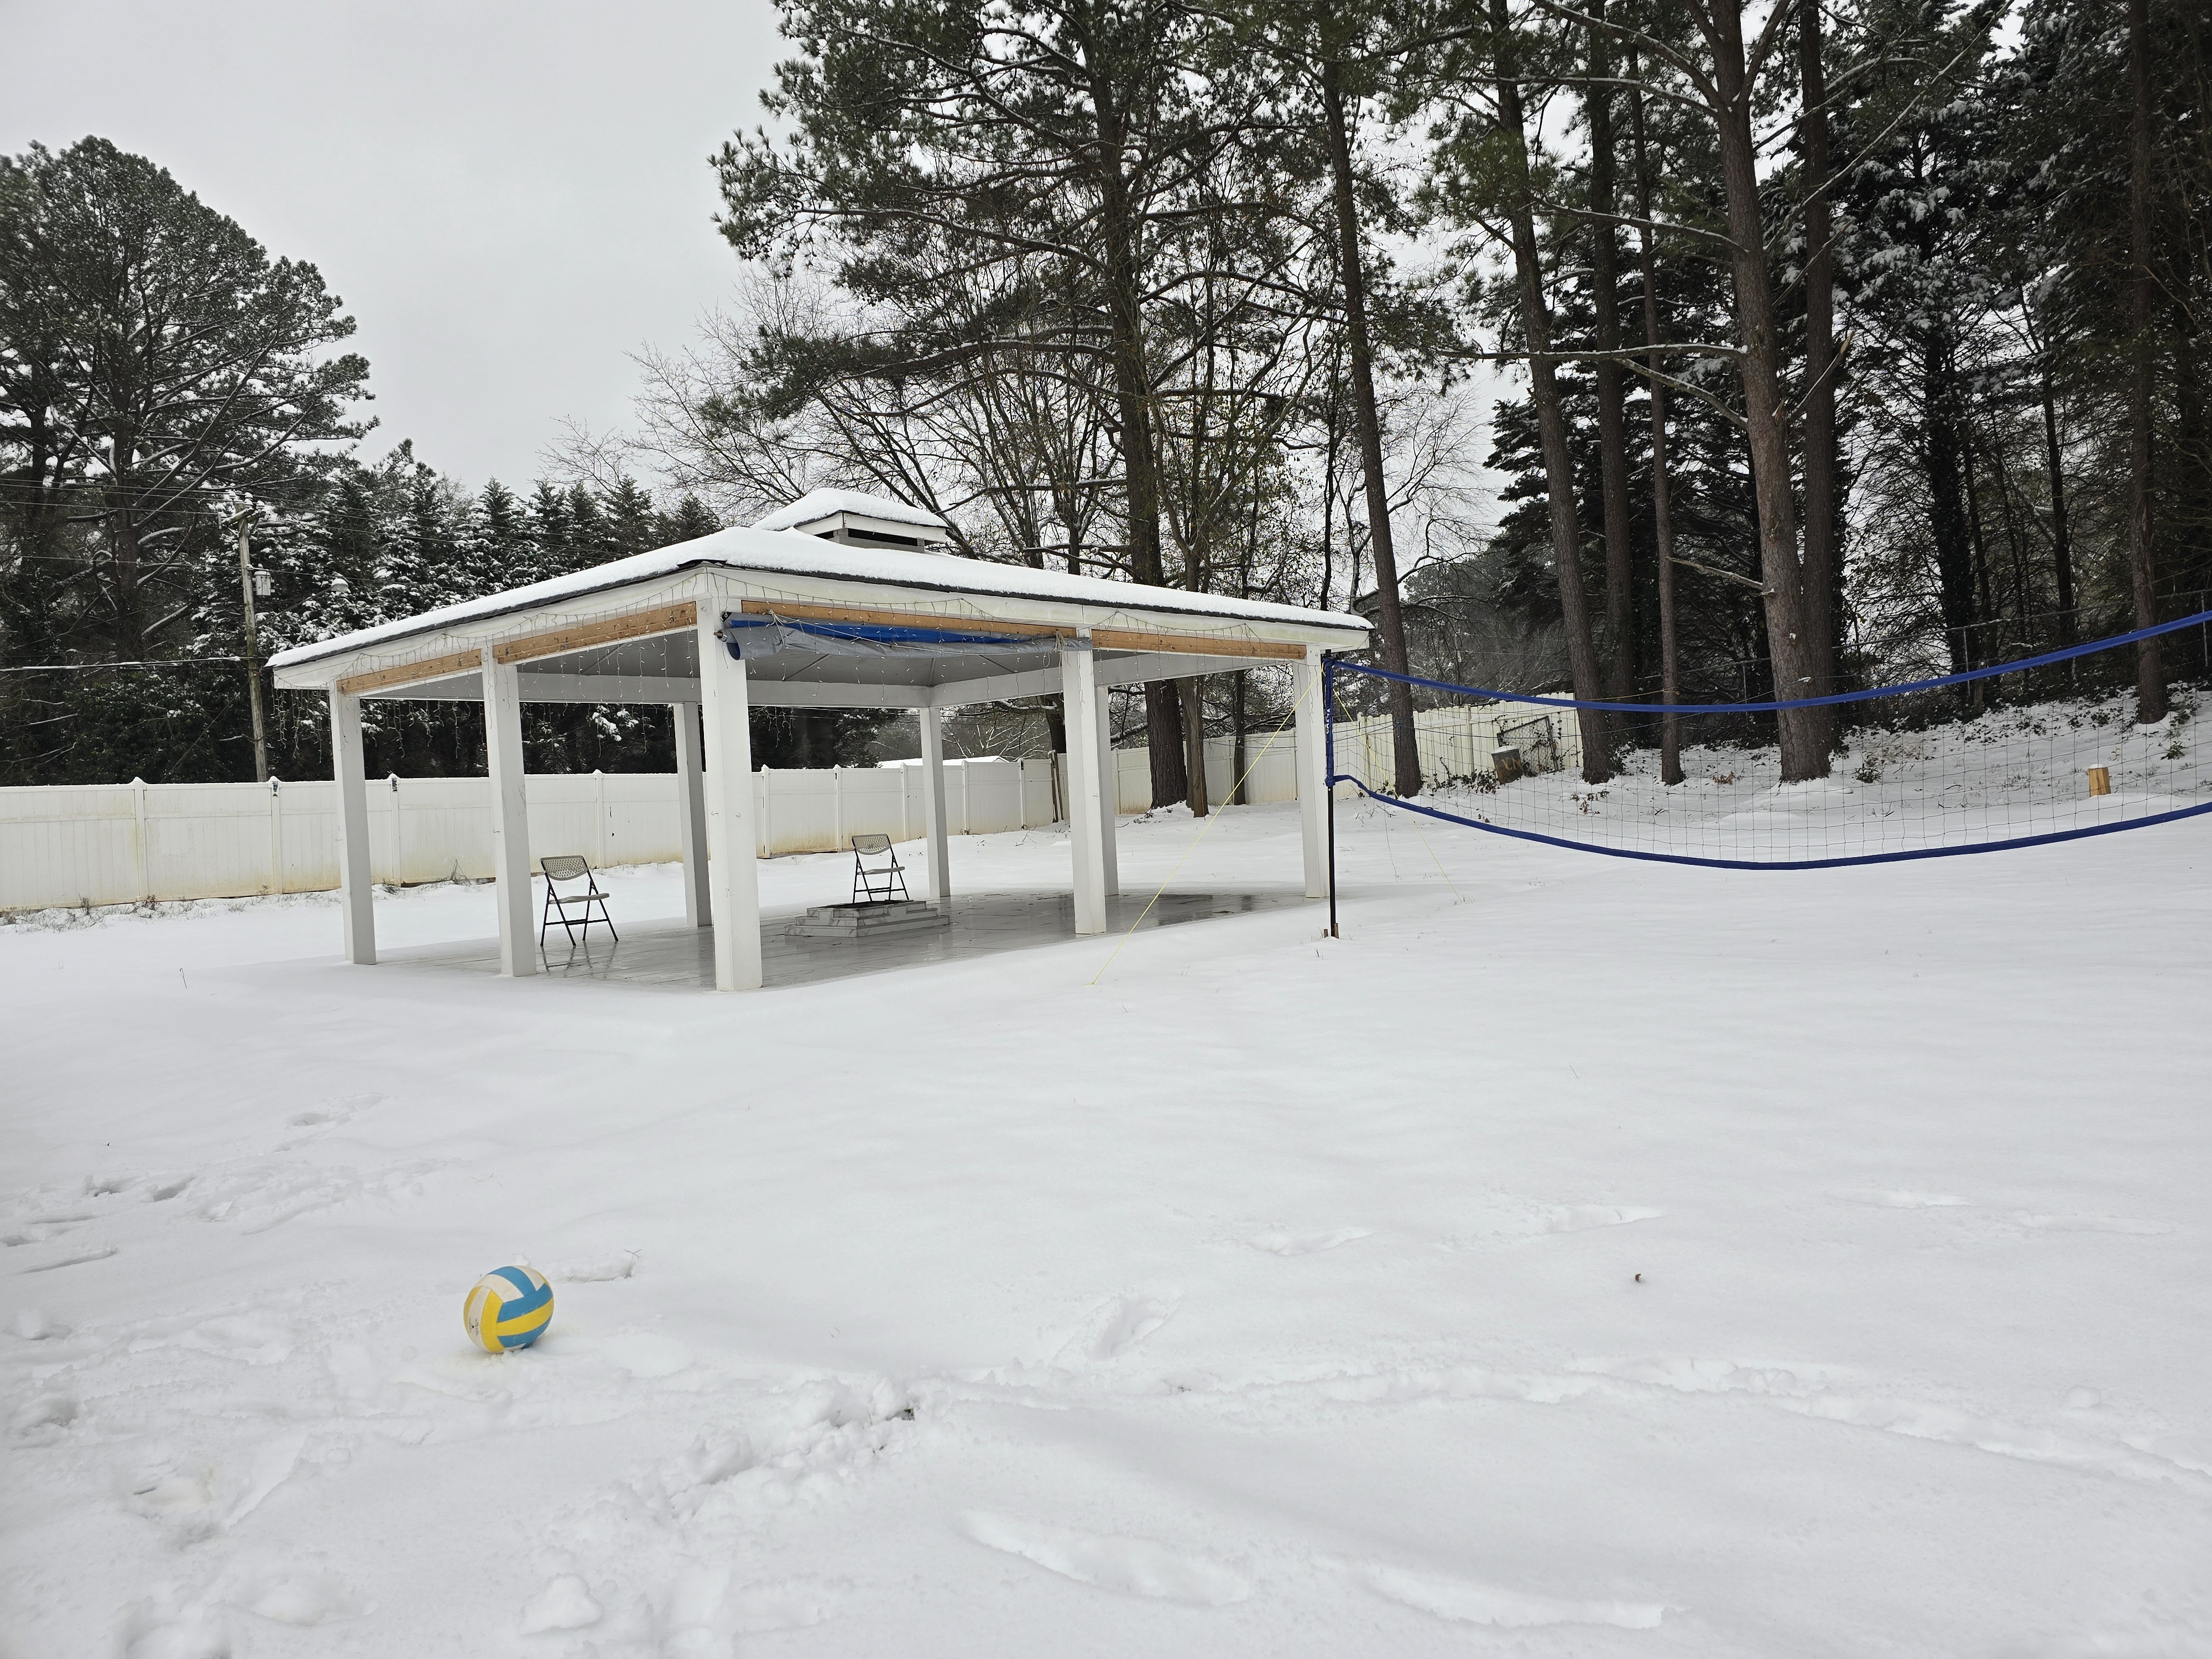
- My role
- Designed and built with my father
- Footprint
- Approximately 35 × 30 ft
1,050 sq ft - Project cost
- Approx. total project cost: $22,000
Why I built it
I wanted the havan kund to have a permanent home: somewhere we could return for Agnihotra, shared ceremonies, and time together. That purpose shaped the layout, the central altar, and eventually the decision to build a roof.
From ground to gathering place
Inside the build.
The completed pavilion in winter, with its raised central roof visible above the main roof.
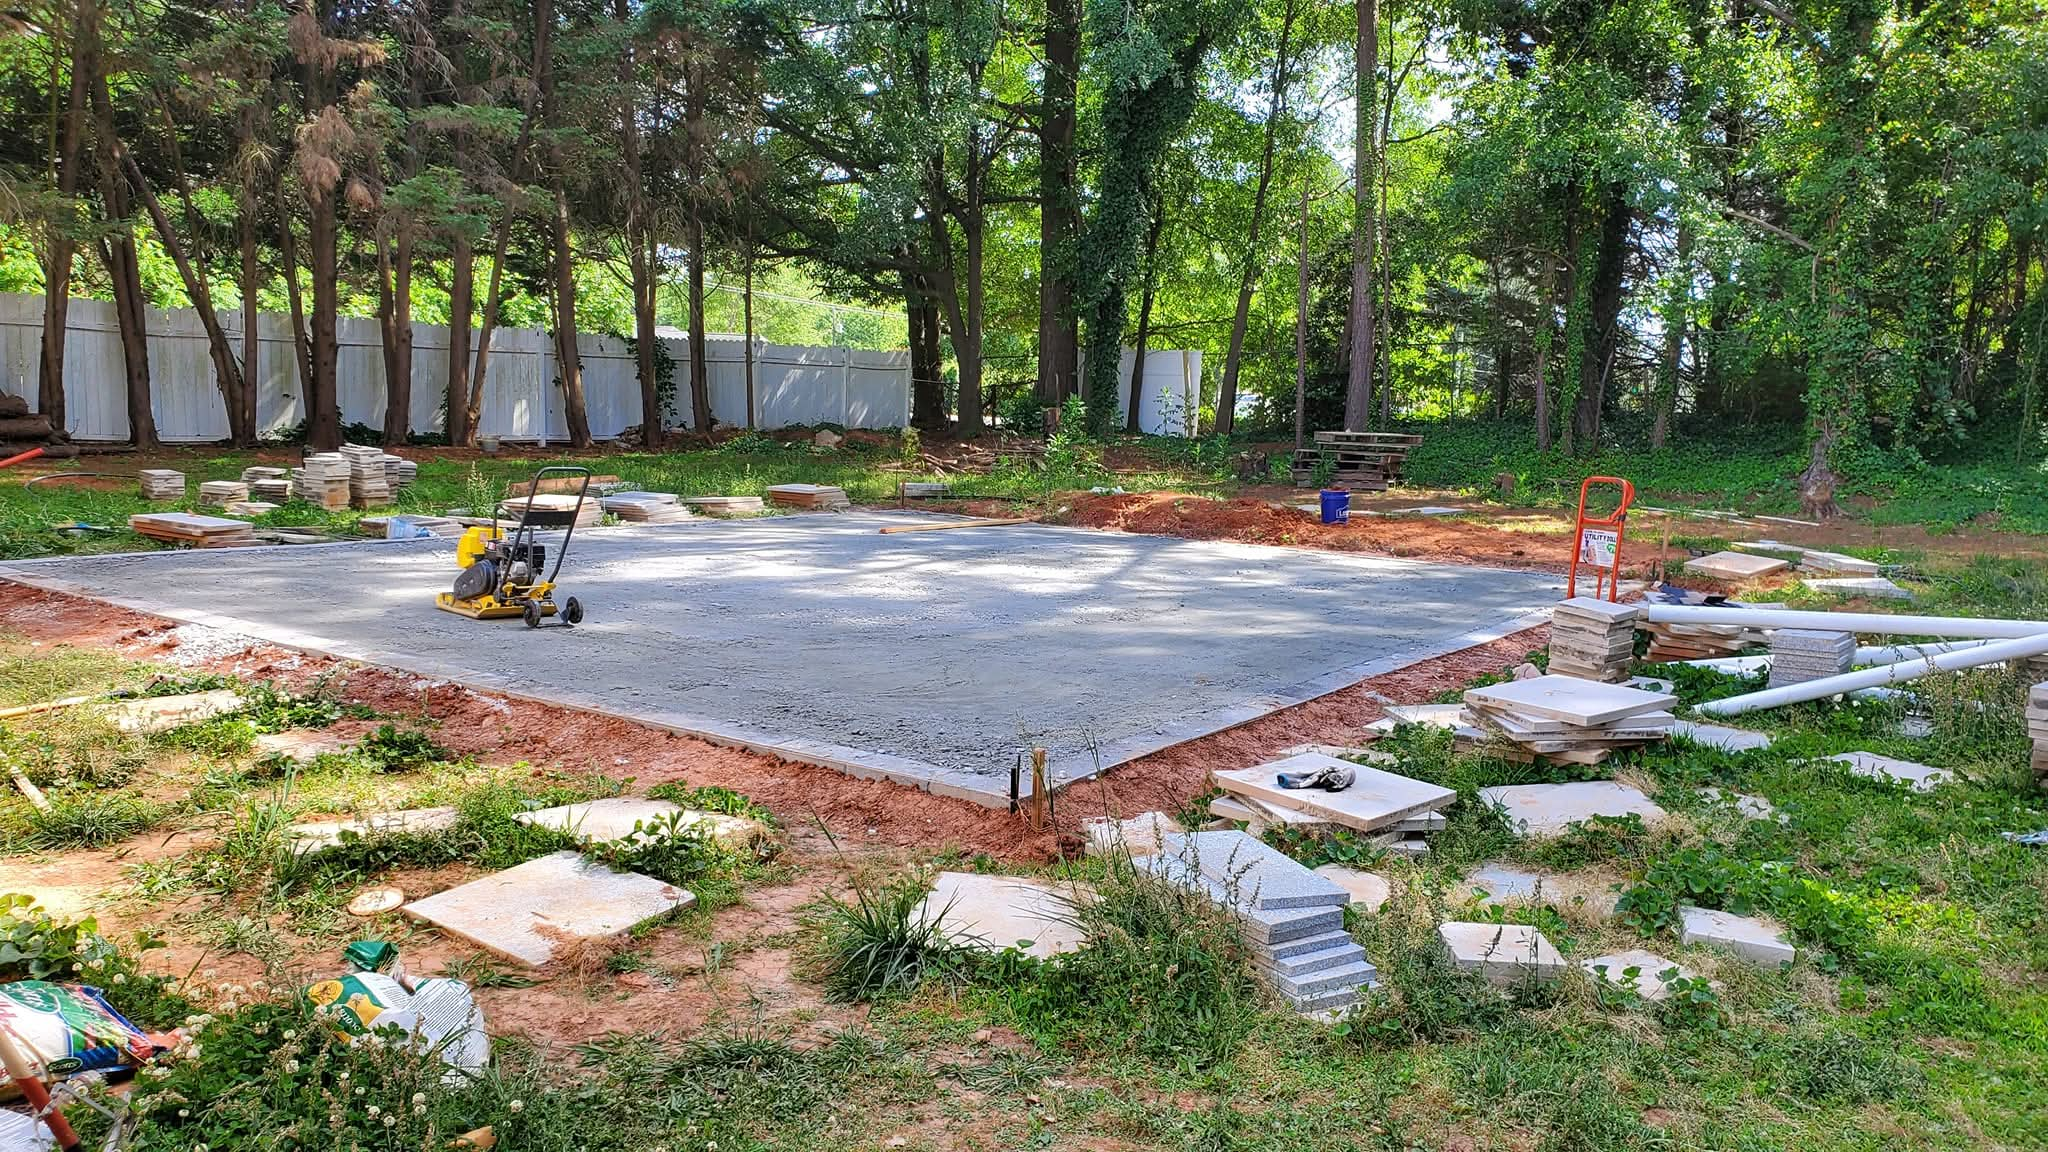
Compacted aggregate, a plate compactor, and staged pavers before the first surface was laid.
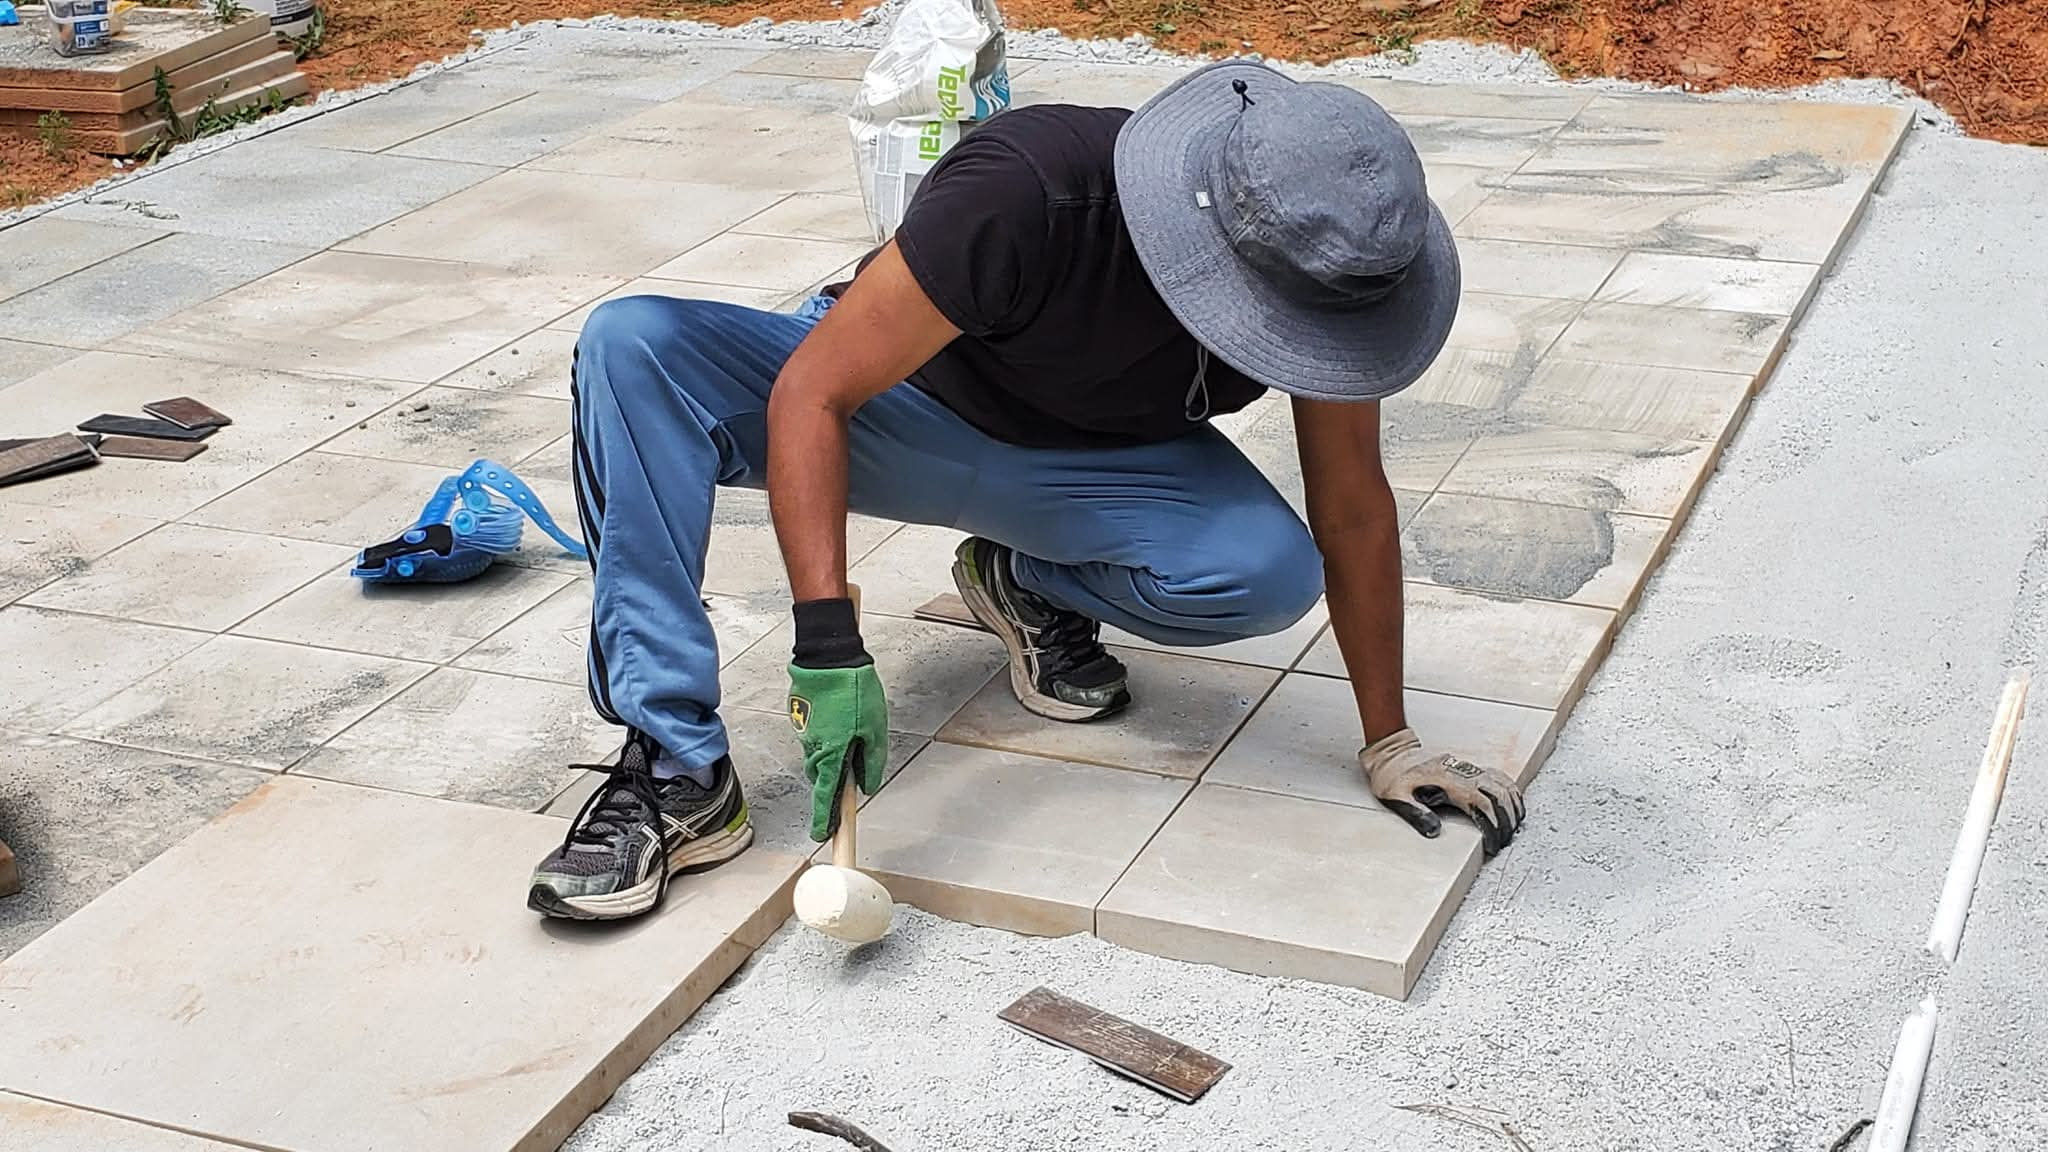
Placing and aligning the outdoor pavers by hand.
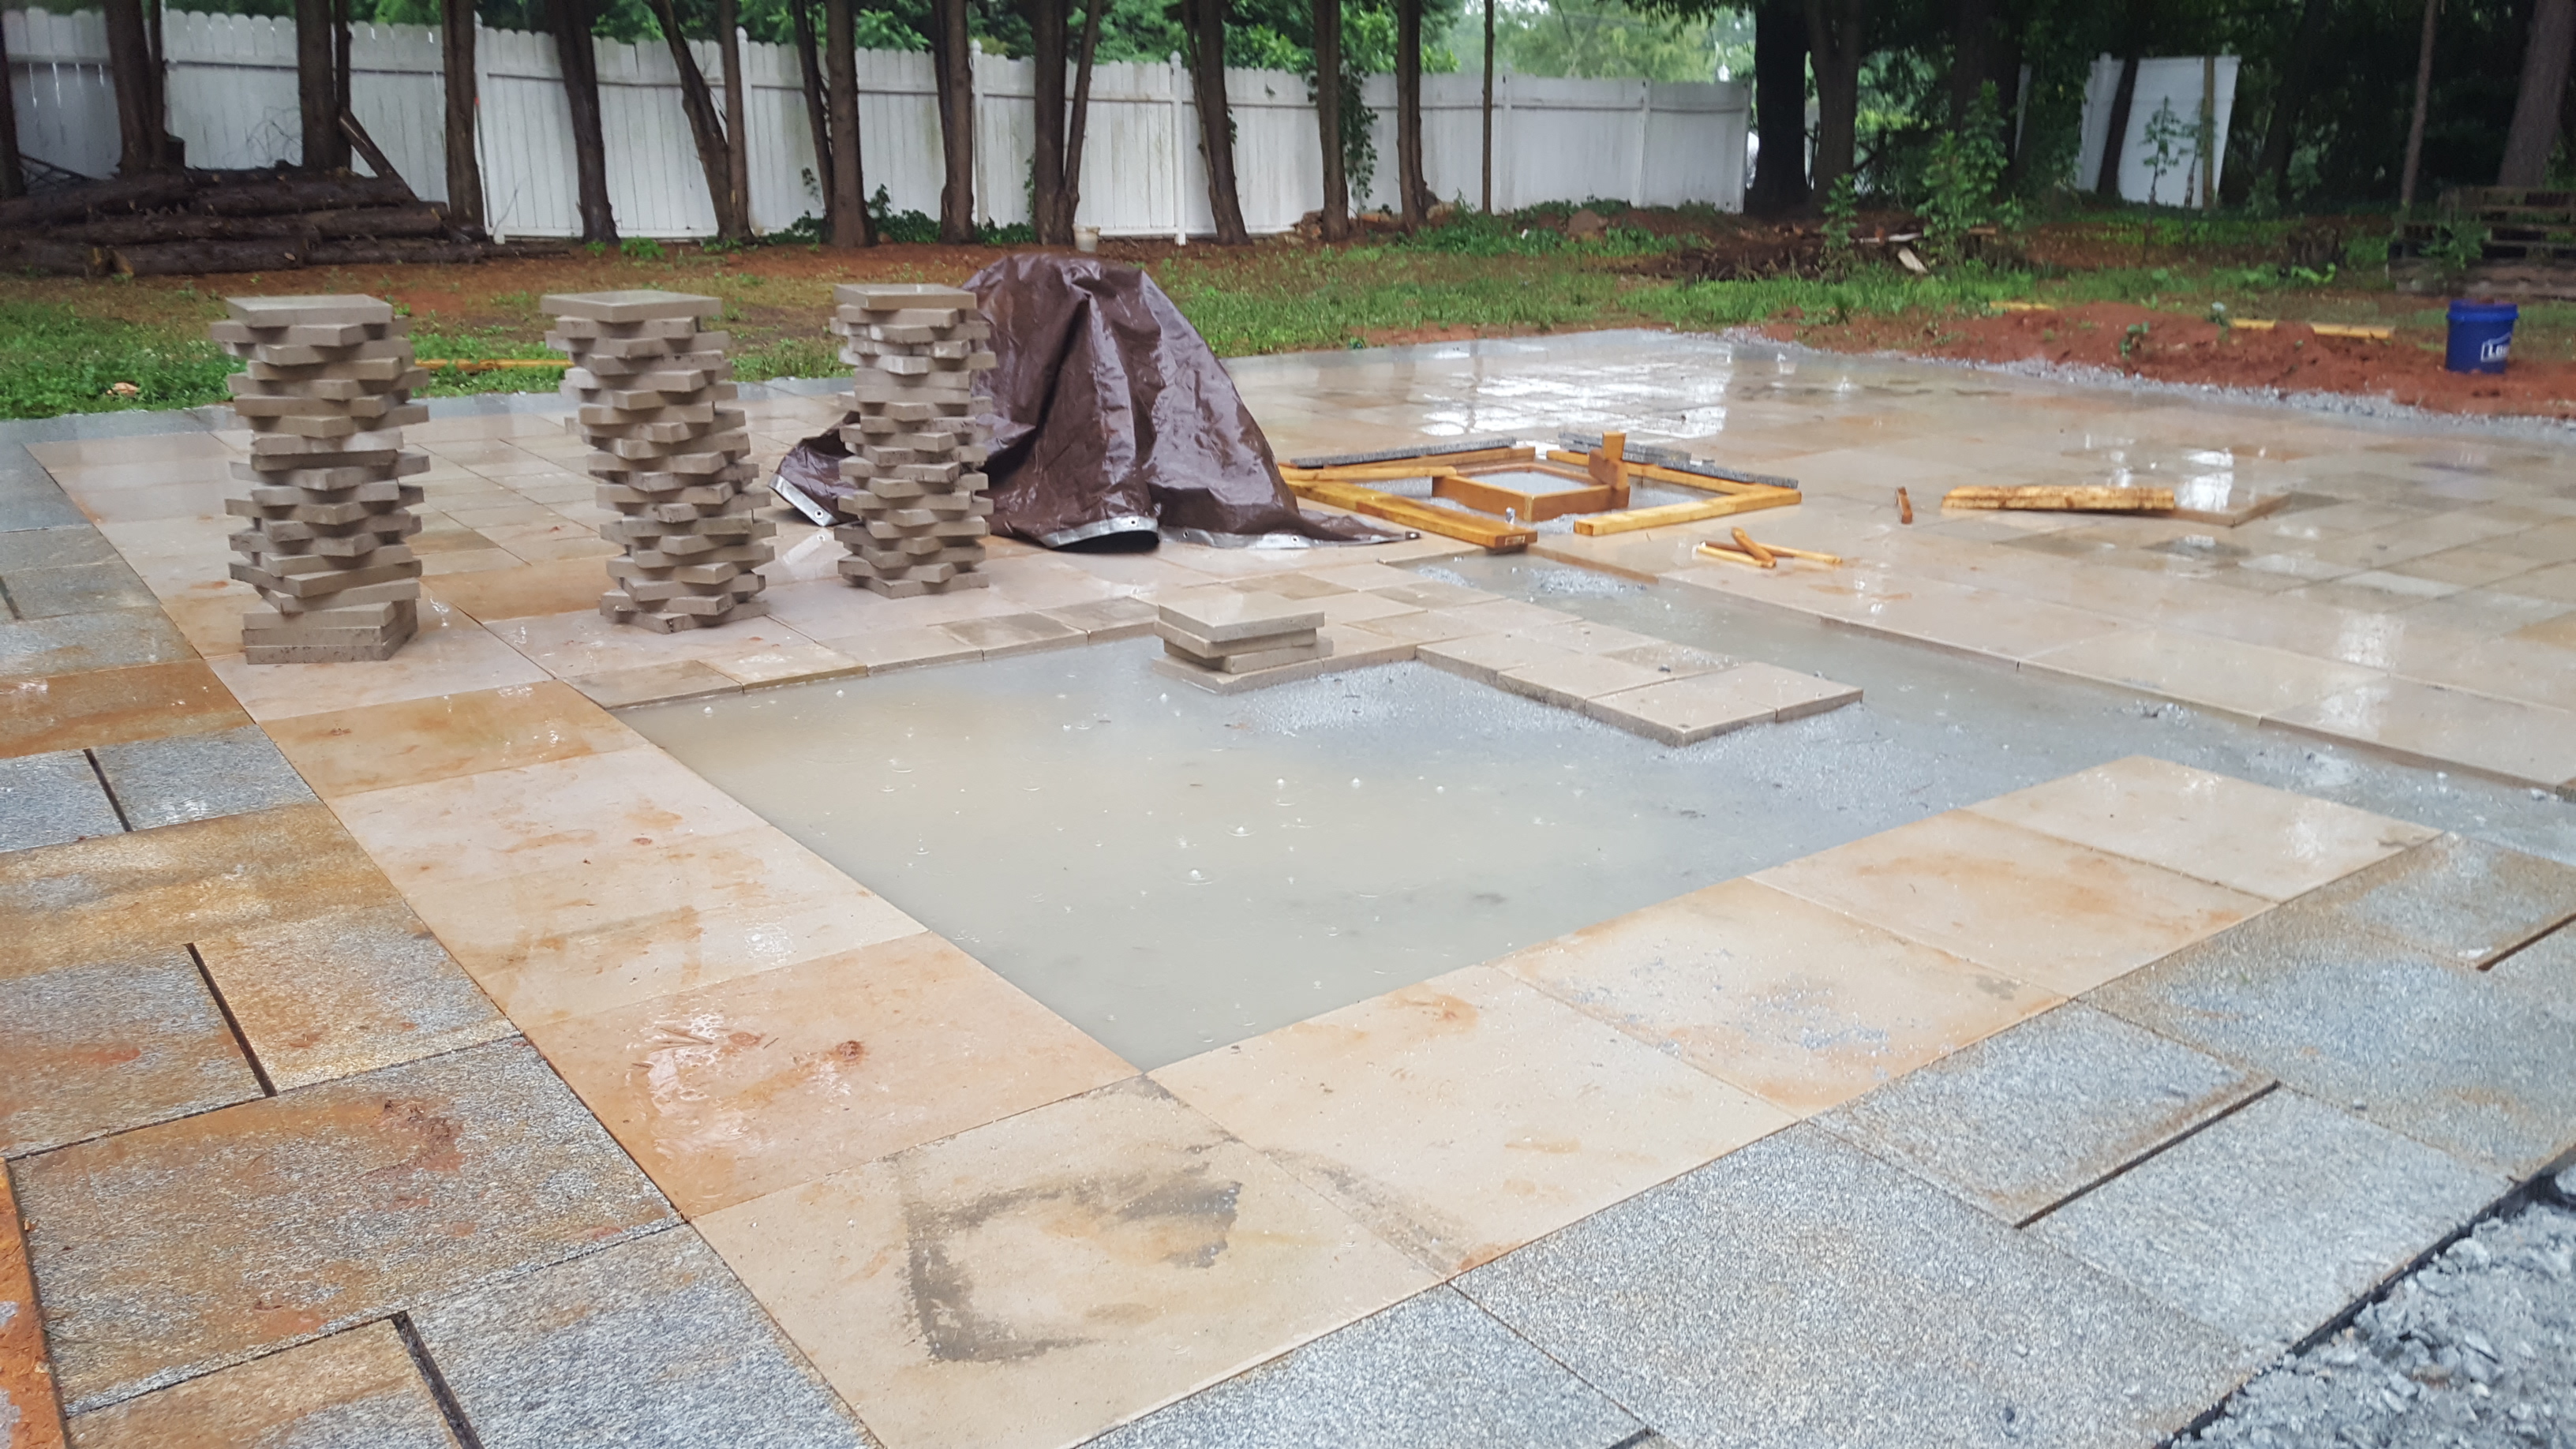
Rain across the first paver field during construction, with unfinished areas and altar forms visible.
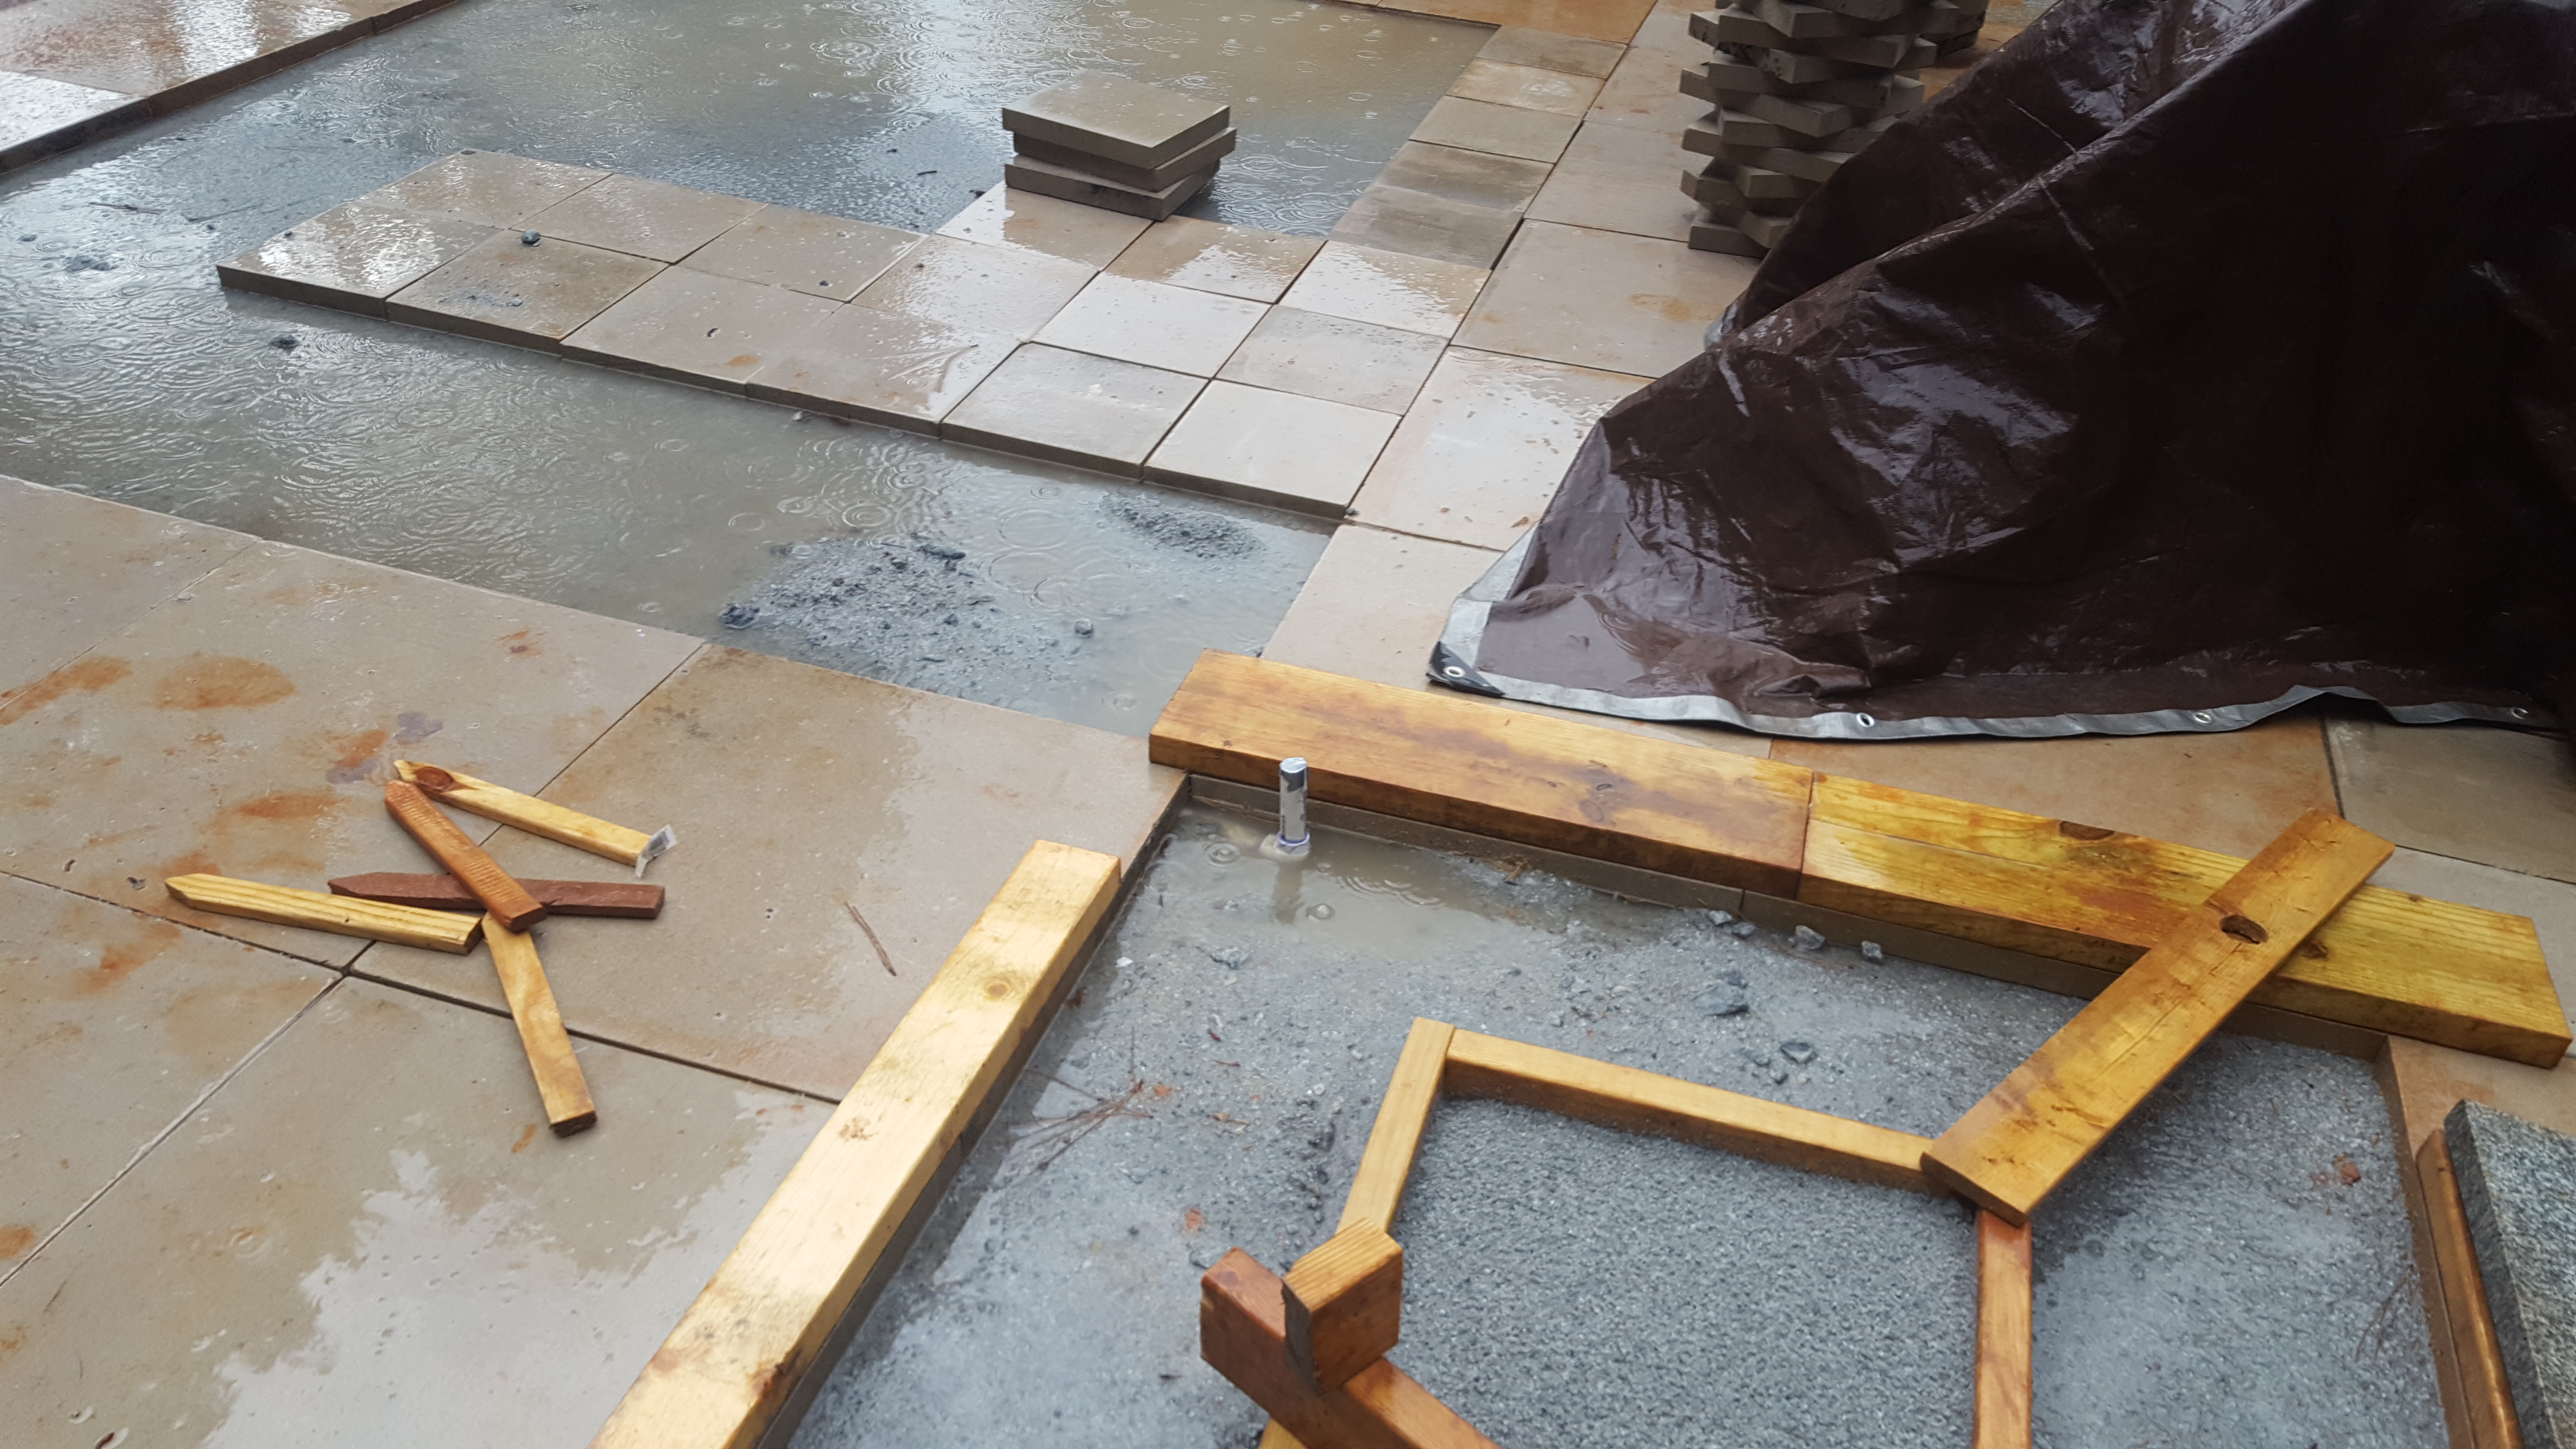
Timber forms and cut pieces around the central work area.
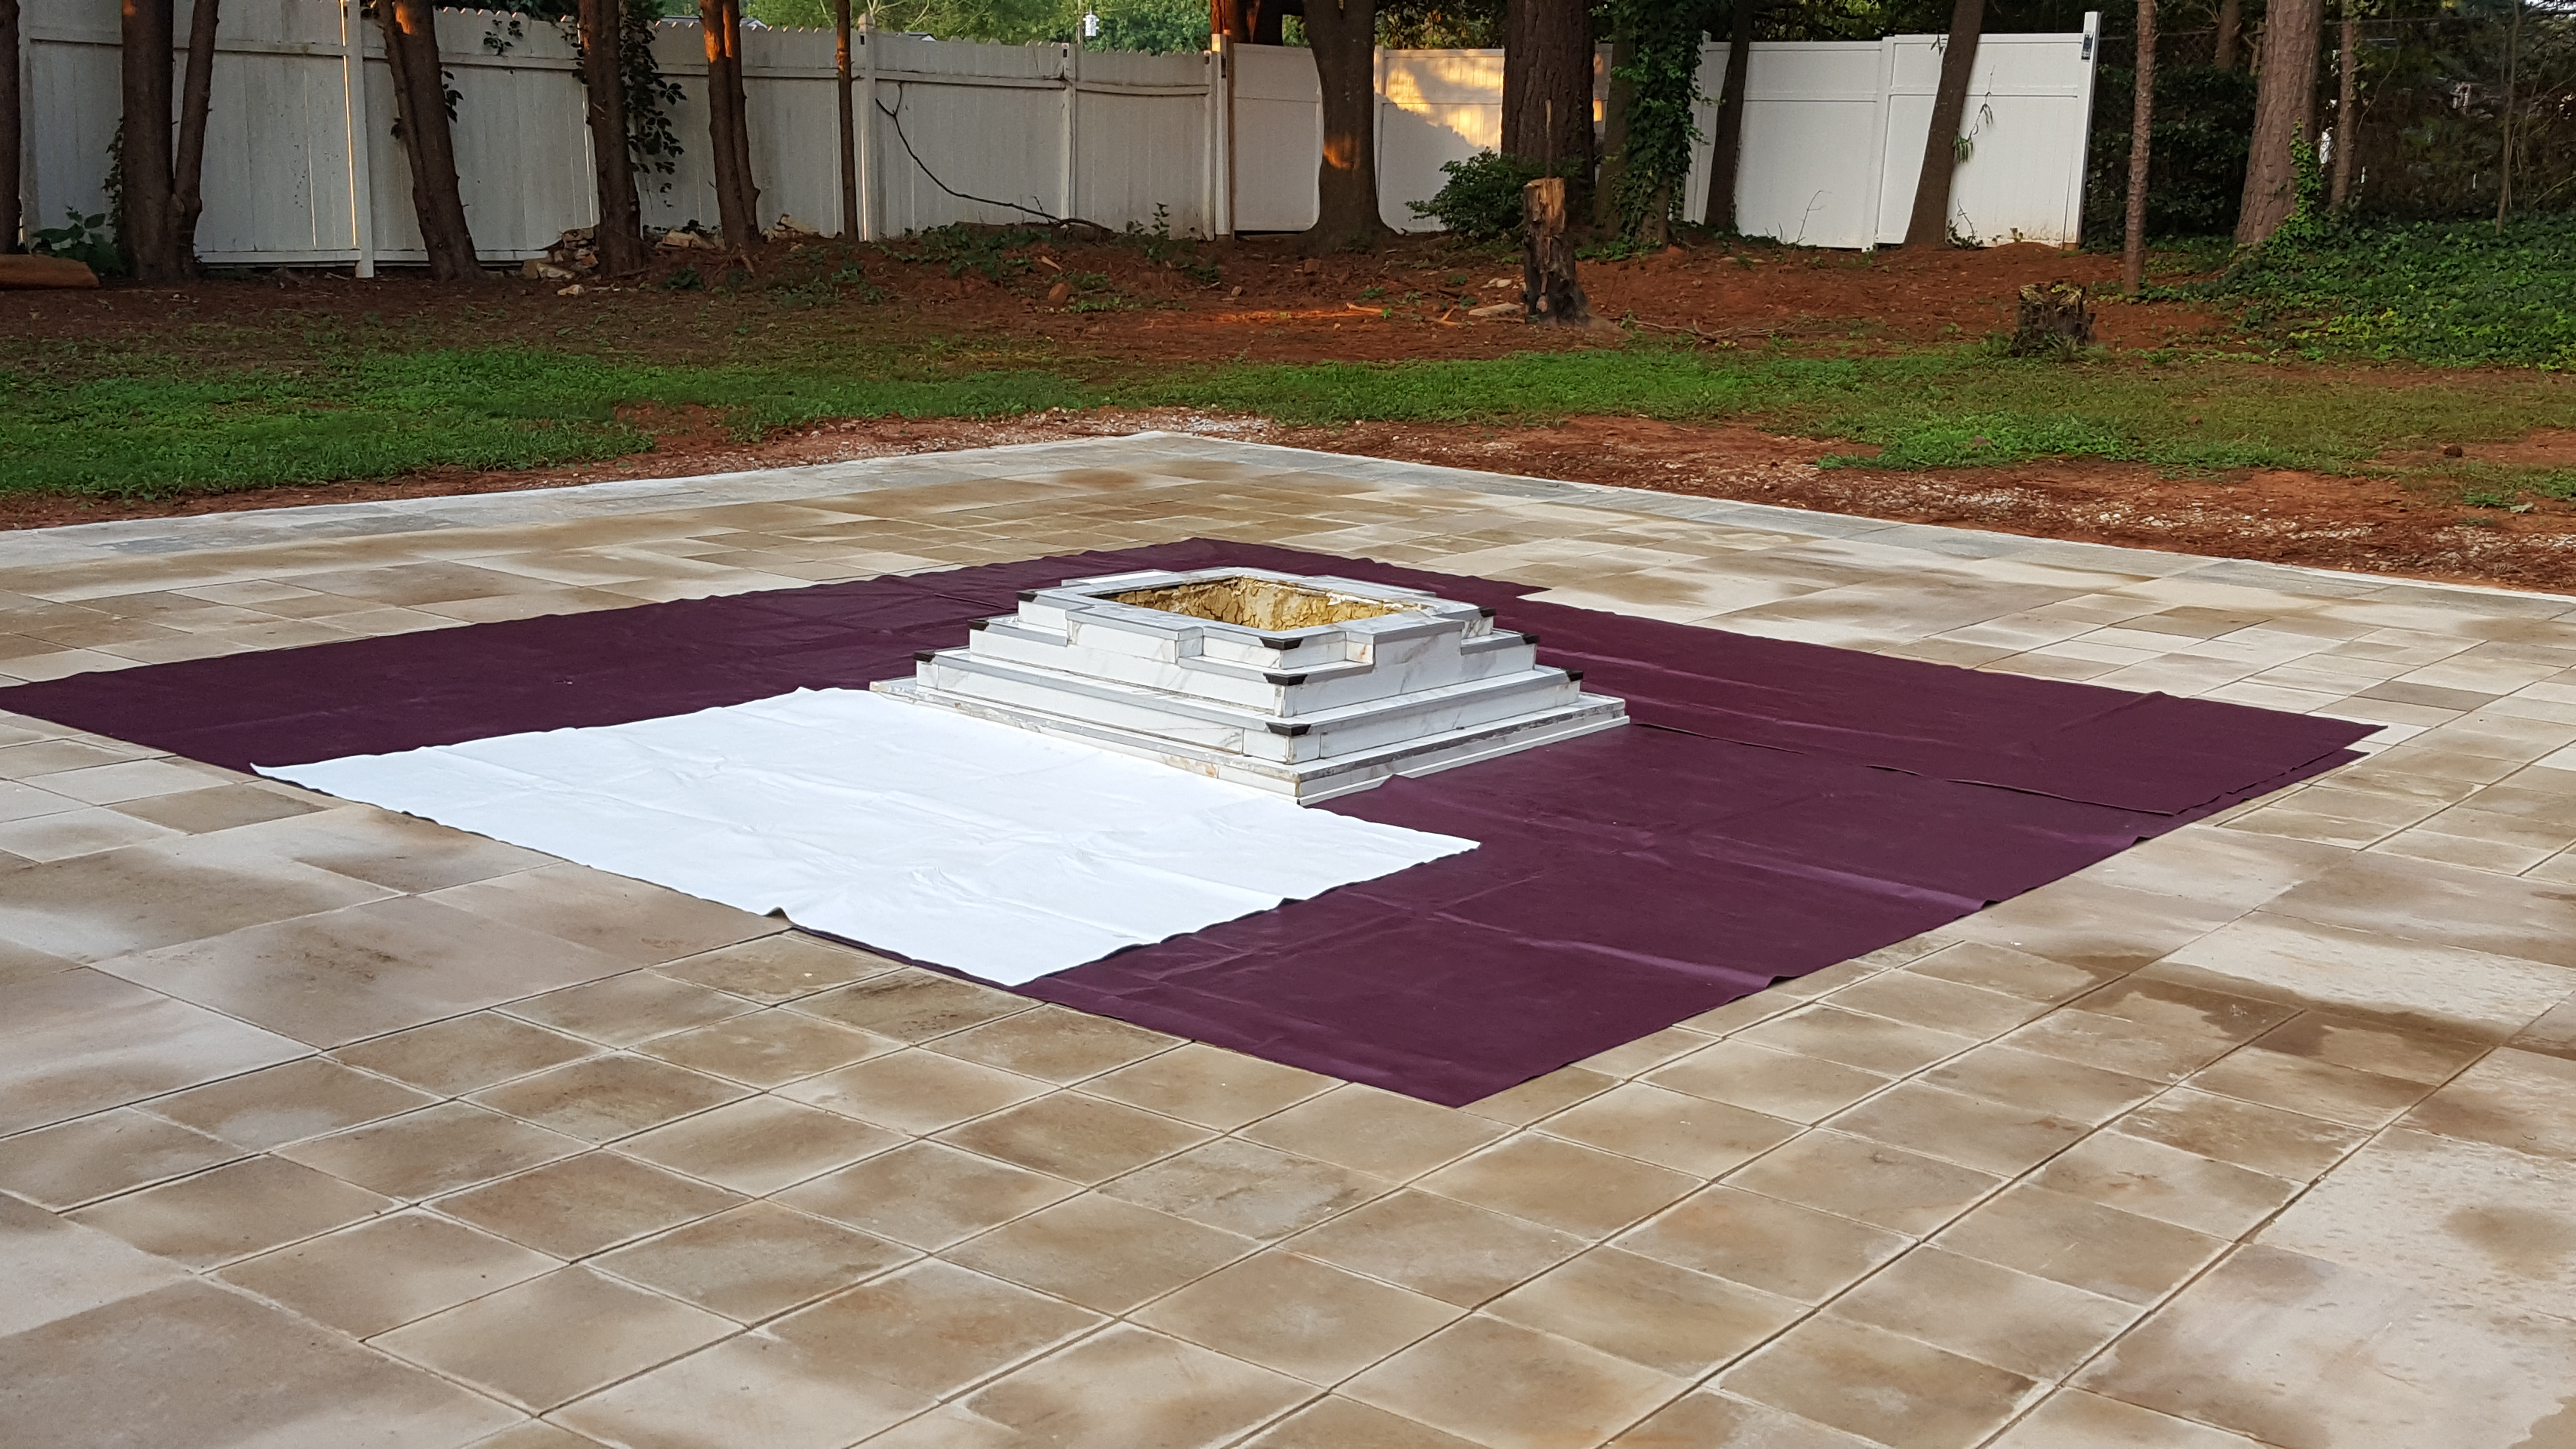
The finished stepped altar and the surrounding paver platform arranged for a gathering.
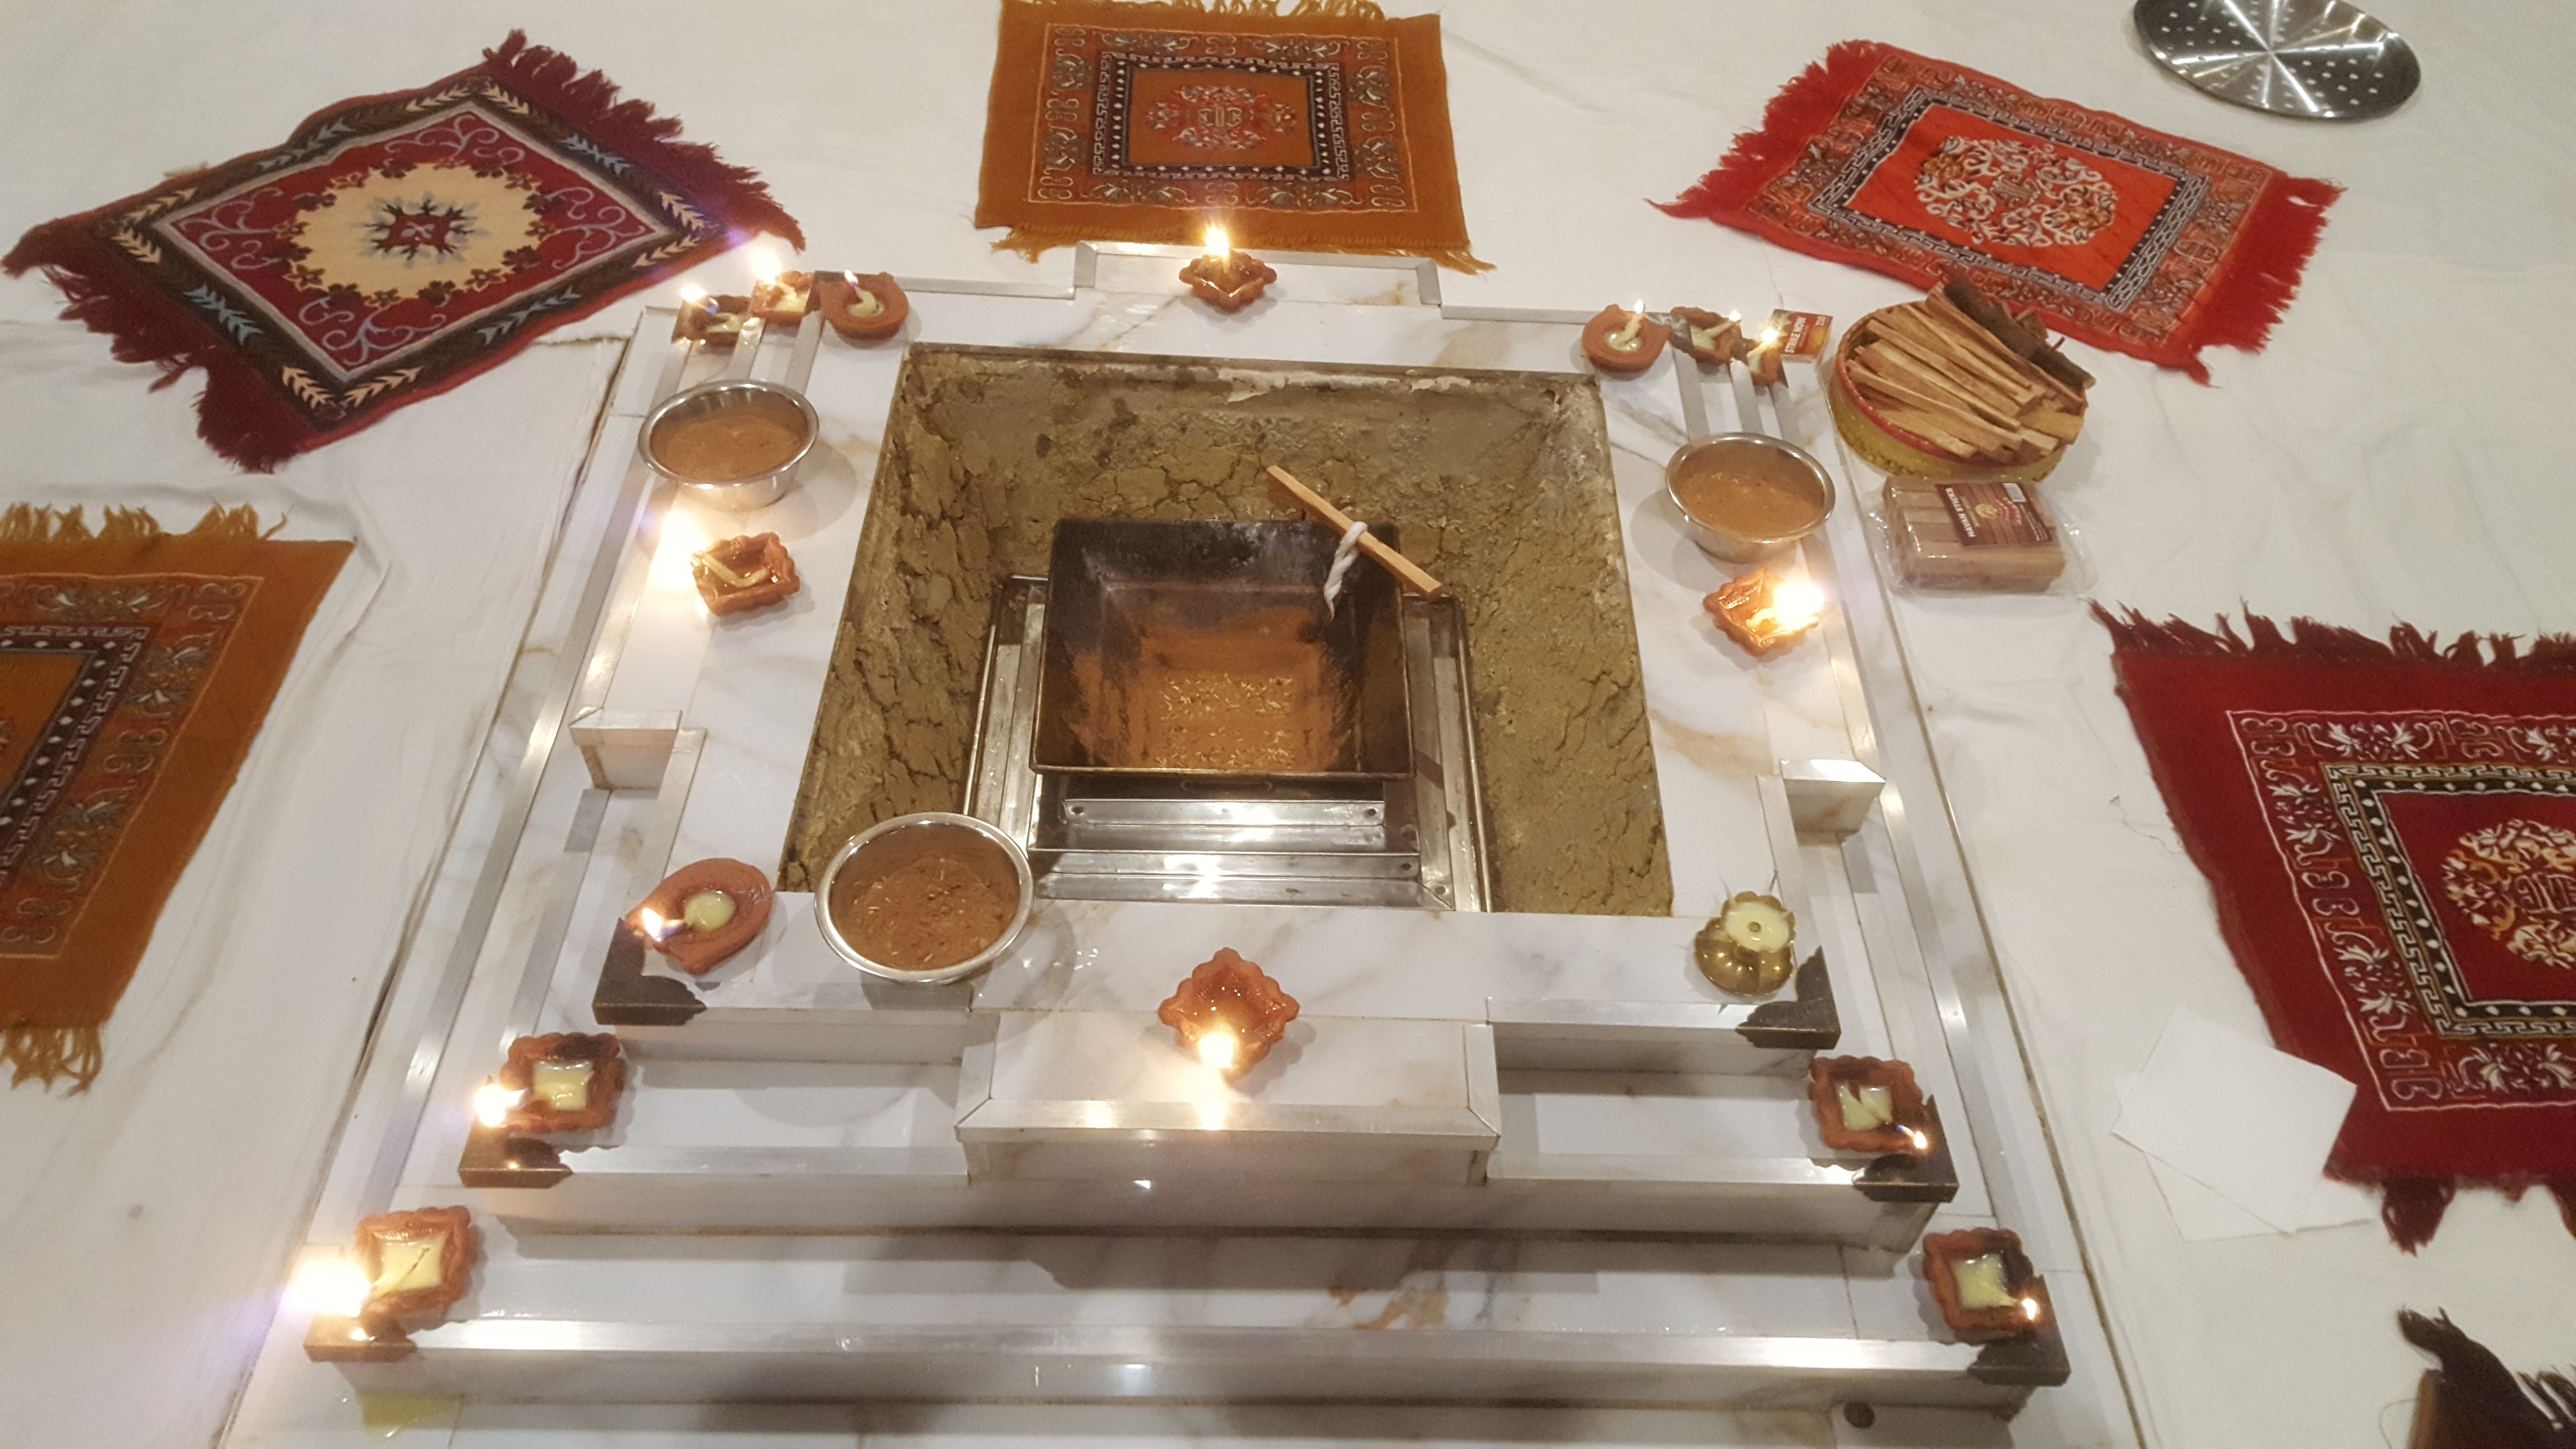
White stepped finishes, lamps, and seating around the central fire cavity.
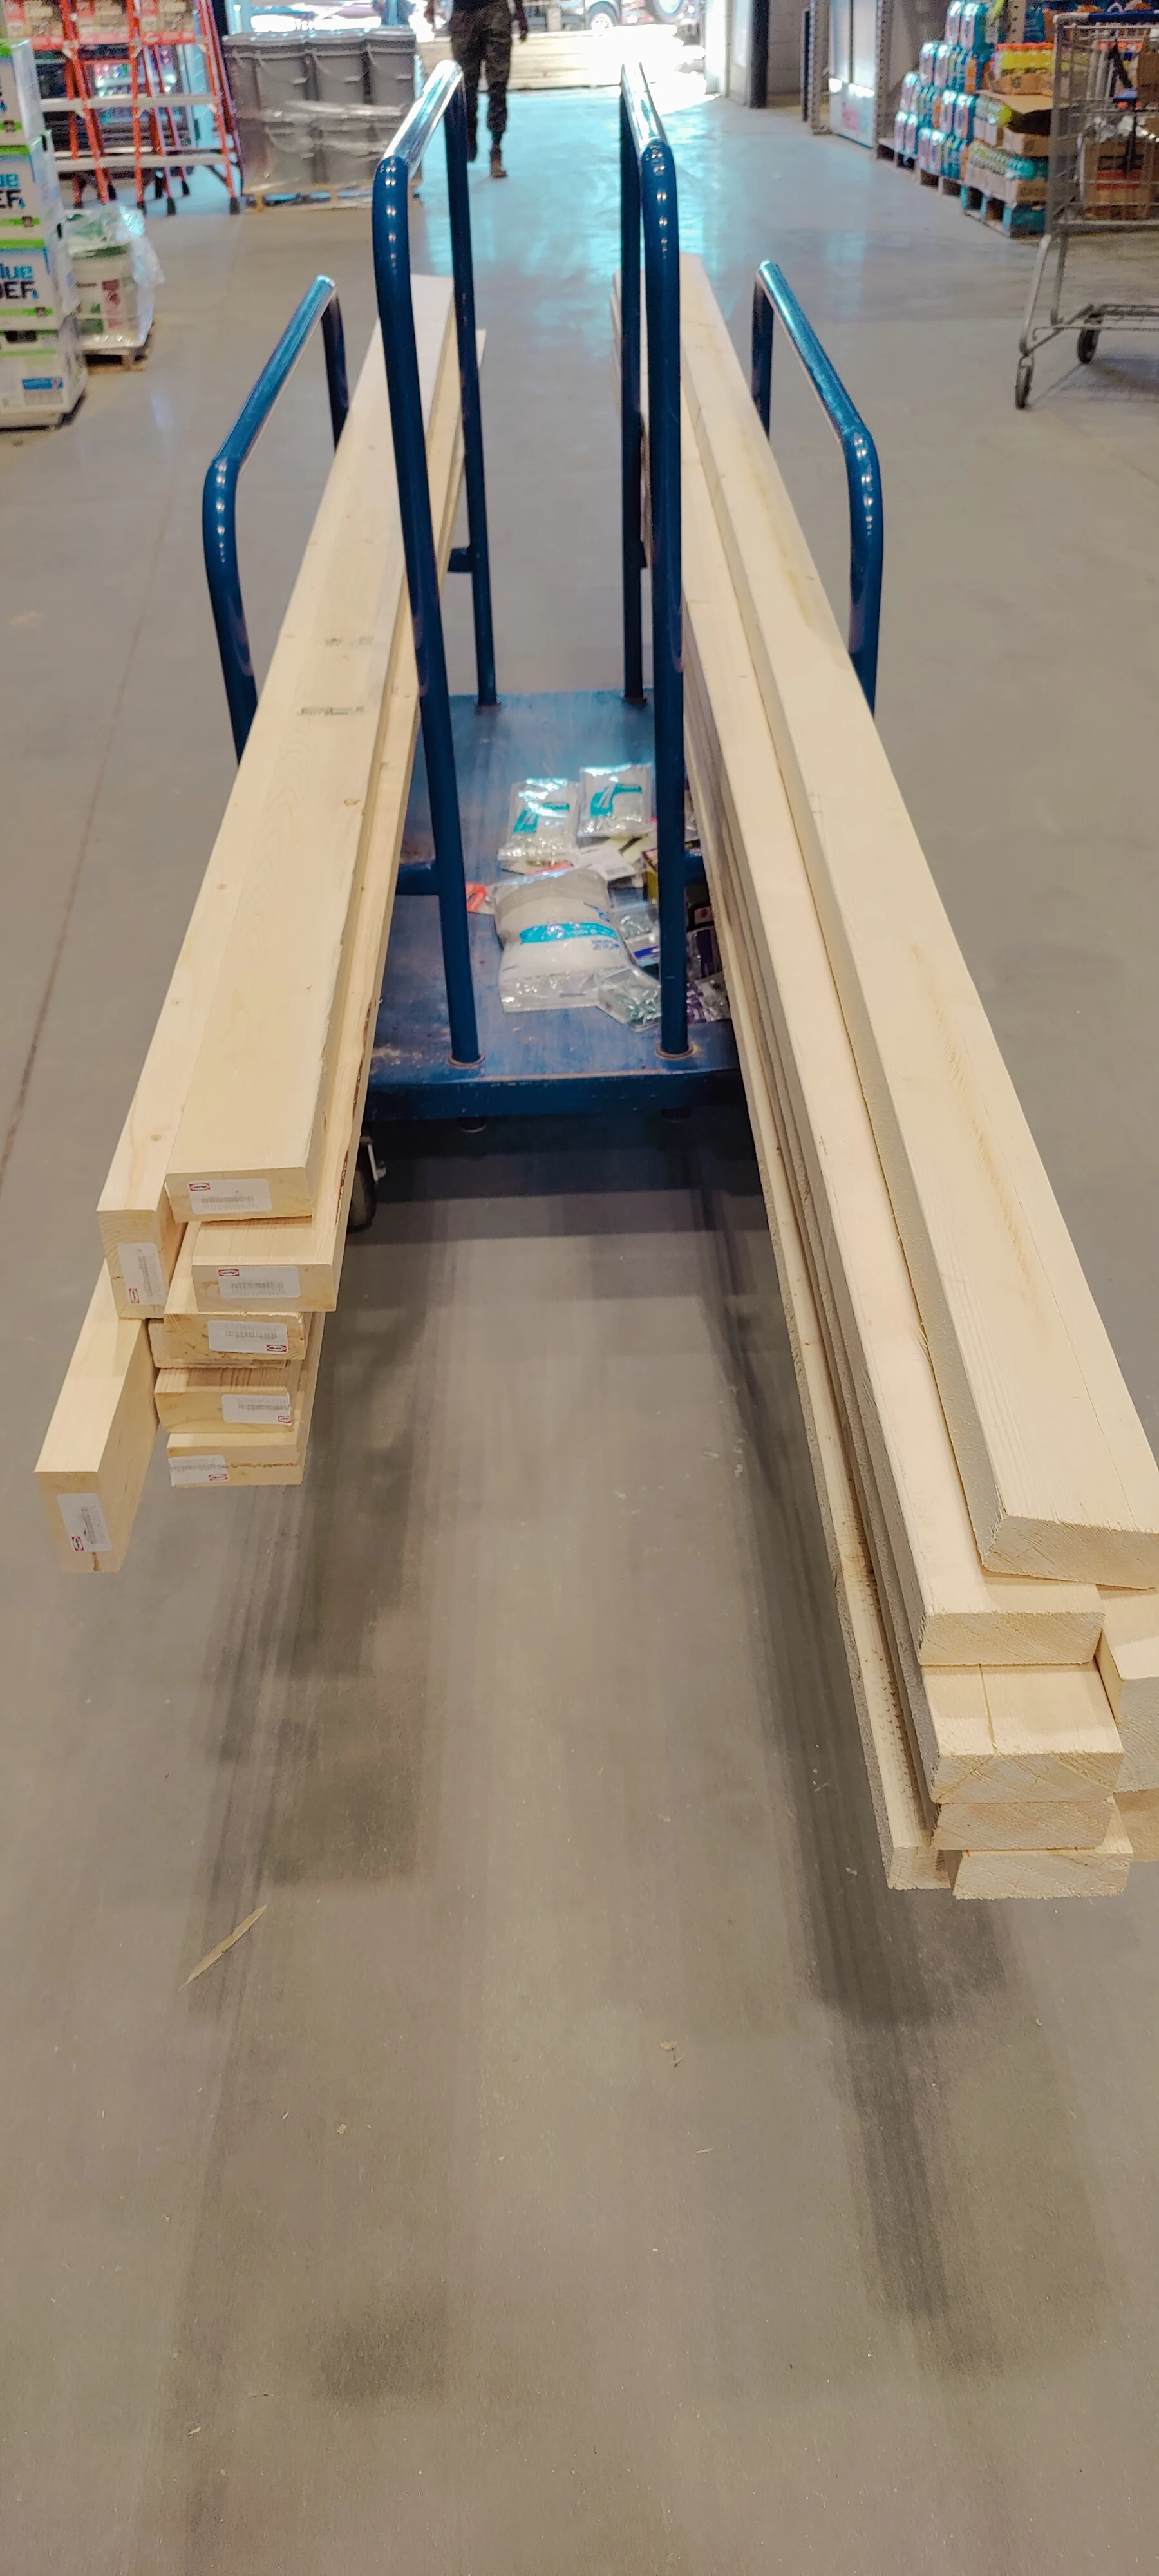
Lumber and hardware gathered for the pavilion work.
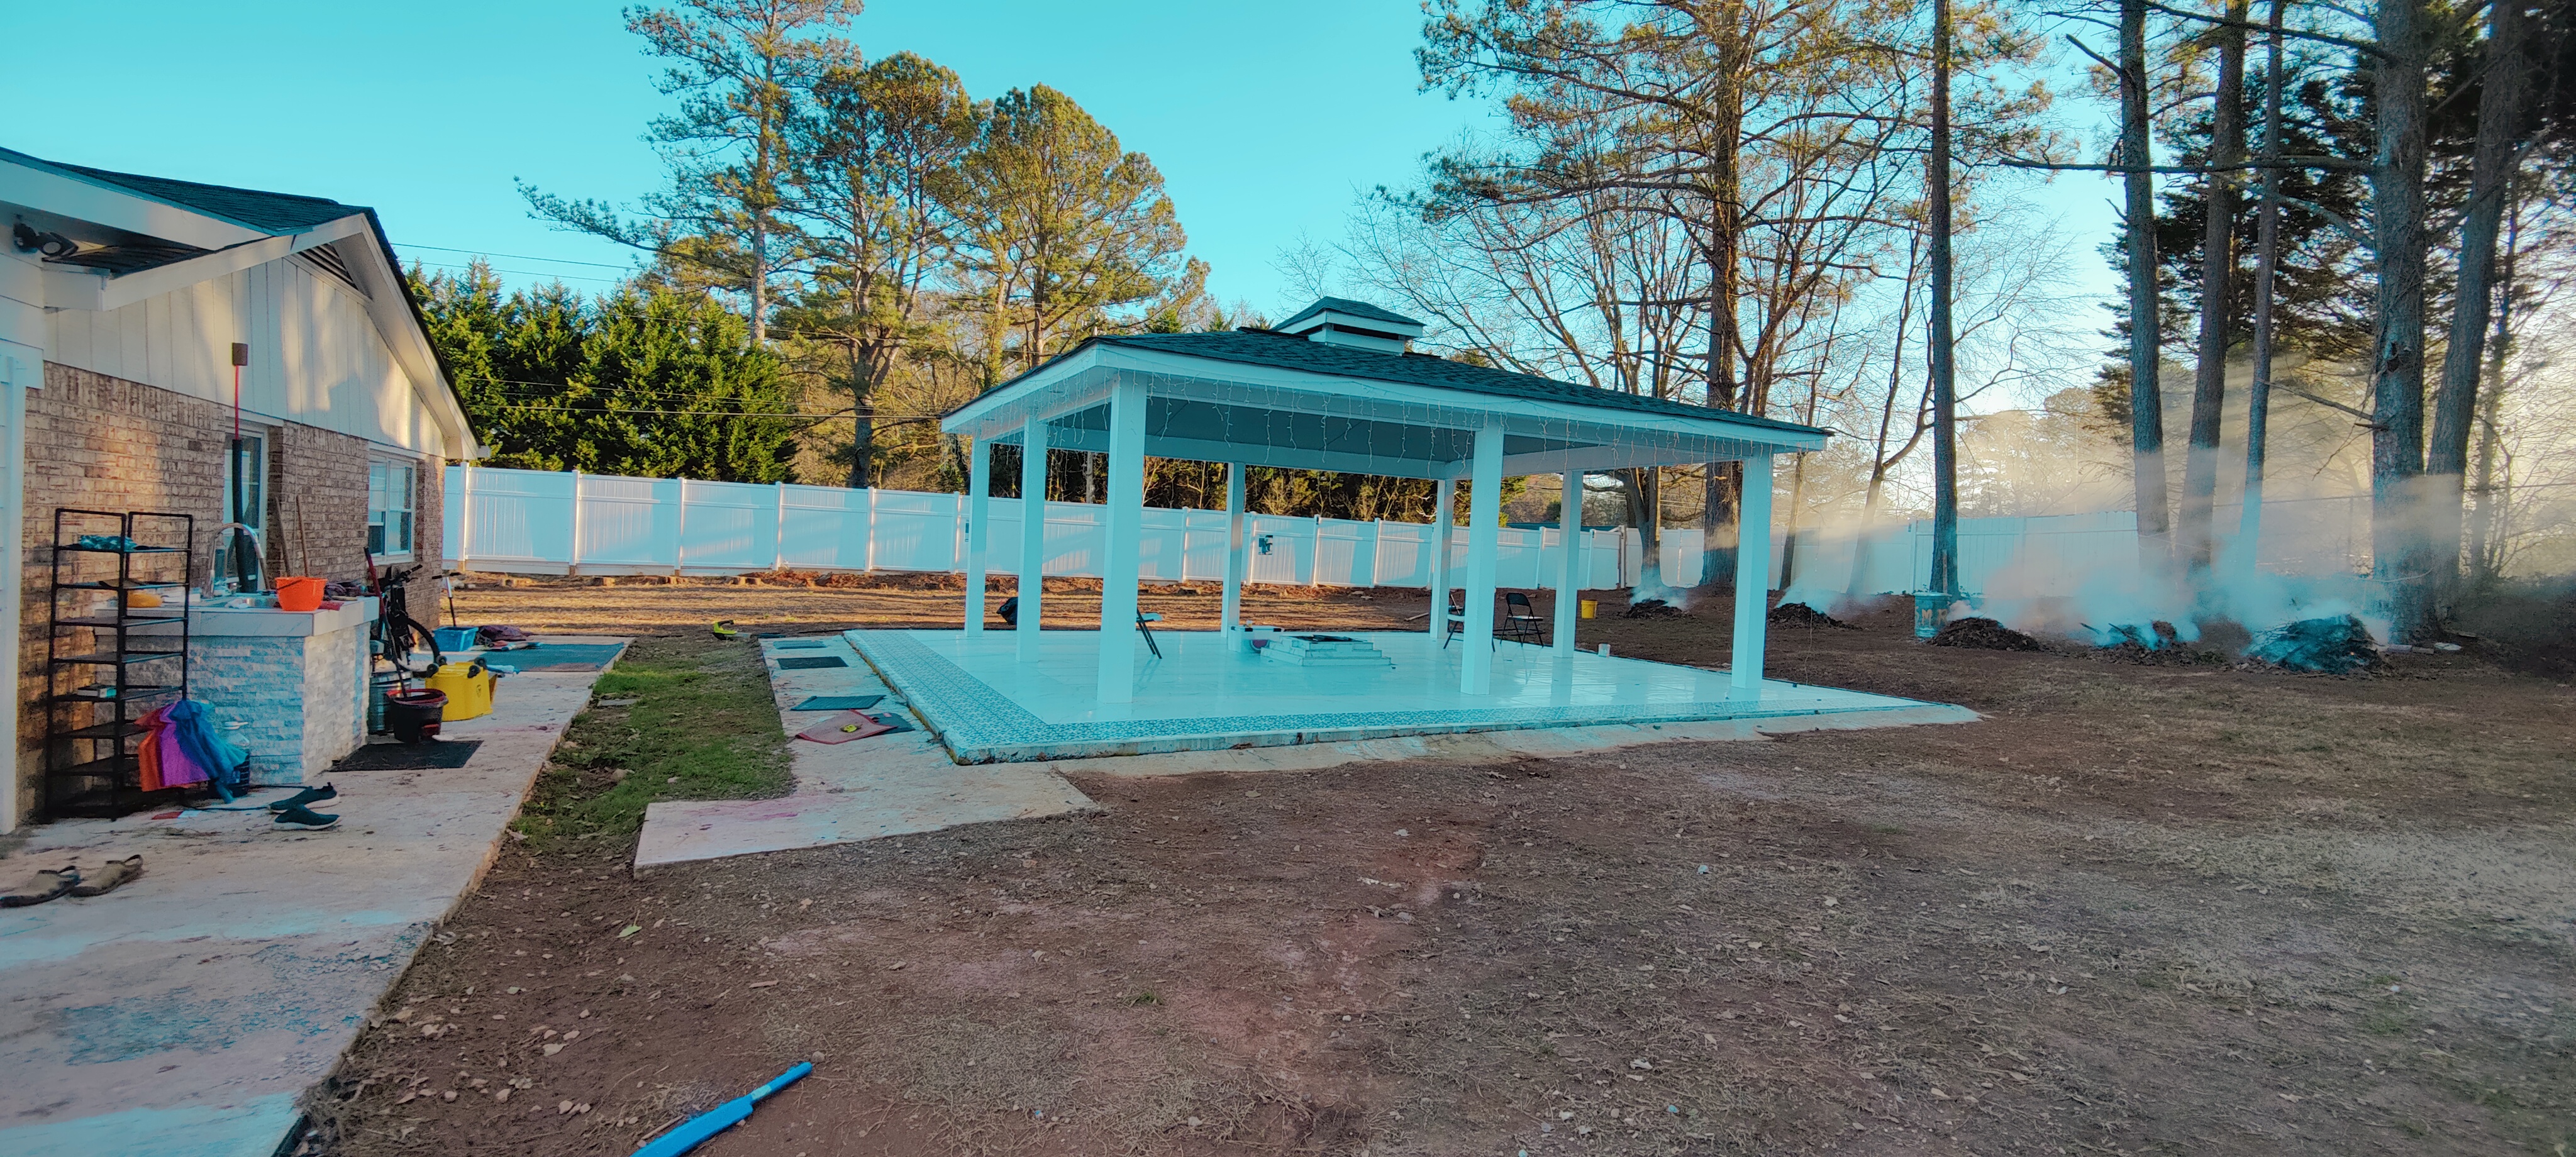
A wider view of the completed roofed structure and its setting.
01 / Clearing and layout
Start with the ground.
My father and I cleared the construction footprint, marked the rectangle with stakes and string, and checked the layout with a level. We removed the top layer of soil and weeds and installed landscape fabric before placing the base.
I learned that the finished surface depends on work that will eventually disappear underneath it: layout, preparation, and repeated checks over a large area.
02 / Compacted base and pavers
A surface assembled by hand.
We placed crushed aggregate, compacted it with a rented plate compactor, and added a thinner sand bedding layer. I used string lines and a level to keep the broad surface controlled as we worked.
I laid the mixed-size outdoor pavers, controlled the gaps with spacers, and cut pieces around the edges and central work. The repeating pattern gave the gathering area a clear boundary around the altar.
03 / The custom altar
The center came first.
I designed the fire cavity as an inverted truncated square pyramid: a small square bottom opening outward toward the top. I made a removable form and built the surrounding stepped structure through separate pours.
I cut white finish pieces around the steps and edges. The geometry mattered, but so did how people would sit around it: the altar was the reason for the surrounding platform, not an accessory added afterward.
04 / Weather and the rebuild
Use revealed what needed to change.
The first open platform served its purpose, but rain and the lack of shelter limited when we could gather. Water across the work area made weather protection a central part of the next phase.
We removed the original paver surface and reused the compacted base. I installed perimeter forms and helped rebuild the walking surface as a continuous poured concrete/cementitious platform. We also reworked the altar during this rebuild.
05 / Timber frame and roof
Build shelter around the gathering.
We laid out eight main column positions, set and temporarily braced the timber columns, and checked plumb, level, and diagonal alignment. Perimeter beams and sloping roof members connected the structure around a rectangular central opening, 5 × 4 ft.
I kept that opening in the roof design and built a smaller raised roof above it. The intended passive ventilation path lets rising hot air and smoke leave at the center while the upper roof provides cover from direct rain. This describes the design approach, not a measured smoke-removal result.
We completed the roof with sheathing, underlayment, shingles, flashing, and trim, then primed and painted the exposed structure white.
A moment from the material run
A brief view of lumber loaded into the vehicle. Open the clip directly ↗
06 / Finish and continuing improvements
A space we can keep improving.
I installed the final exterior floor finish over the rebuilt platform, laid out the pattern, and cut the edges. The finished pavilion brought the altar, seating area, and shelter into one place.
Wind-driven rain still reaches an open-sided structure. I am considering removable or retractable screens, selected polycarbonate sections, and better runoff management as future improvements. Those are next steps, not completed additions.
Interactive structural model
How the pavilion stands.
A working model of how the pavilion is put together: the platform and footings, eight columns, the perimeter beams and roof framing, and the raised vent cap. Separate the layers or follow the weight of the roof down to the ground.

The pavilion as built: eight columns around the havan kund under a hipped roof with a raised vent cap.
Drag sideways to rotate. In Structure and Exploded, select a part to see the construction photograph behind it.
Working at this scale
Footprint and perimeter.
Both follow directly from the recorded platform dimensions.
| Item | Calculation | Result |
|---|---|---|
| Footprint | 35 ft × 30 ft | 1,050 sq ft |
| Perimeter | 2 × (35 + 30) ft | 130 ft |
Geometry and the next drawing
Working through the numbers.
What the recorded dimensions establish: the 35 × 30 ft platform, the 10 ft eave, and the 5 × 4 ft central opening.
01 / Roof form
A hipped main roof rises from the eaves, about 10 ft above the floor, to the edge of the 5 × 4 ft central opening. A smaller raised roof covers the opening, its 5 ft side parallel to the 35 ft side of the platform.
02 / Why rain still reaches the platform
The sides are open, so wind-driven rain still reaches the floor. That is why the next iteration considers screens, roof coverage, splash, and where water goes after it leaves the eaves.
03 / Central opening and passive ventilation
Aopening = 5 × 4 = 20 ft² = 2,880 in²
The recorded opening equals about 1.9% of the platform area. I intended the raised opening to give rising heated air and smoke an exit, with a small roof above it for rain protection.
The actual free outlet depends on the gap below the cap, framing, and any obstructions. Opening area alone does not establish airflow or smoke-exhaust capacity.
04 / Following the load path
Roof covering → sheathing → rafters and hip members → beams → eight posts → footings → ground
I use this chain to organize what a measured drawing must capture: member sizes and spans, where reactions enter the beams, connection details, and the foundations. The photographs do not establish those capacities.
05 / What the measured drawing will add
I plan to annotate the hand drawing with the floor and roof outlines, post locations, actual runs and rise, cap dimensions, member sections, connections, and drainage direction. With measured runs, rise and member sizes, the roof area, material quantities and loads can be calculated, and a cut list developed.
The next material takeoff should separate installed quantities from cutting allowances and reused materials. The phase-by-phase cost table below records the spending across both versions.
Across both major build phases
Approx. total project cost: $22,000.
This approximate breakdown is based on my project cost sheet. It includes the first platform and the later rebuild: materials, equipment, delivery, and consumables. Our family labor is not assigned a dollar value.
| Build phase and materials | Approx. cost |
|---|---|
Site clearing and layoutStakes, string and marking supplies; clearing consumables; landscape fabric and staples. | $400 |
Compacted aggregate and sand baseCrushed aggregate, bedding sand, border materials, and plate-compactor rental. | $1,400 |
Original paver platformOutdoor pavers, joint sand, spacers, masonry cutting consumables, and delivery. | $3,300 |
Original havan kundCustom form material, staged concrete/cement pours, white finish pieces, mortar, grout, and tile-cutting tools. | $1,100 |
Concrete/cementitious rebuildPerimeter forms and bracing, platform material, leveling and finishing tools, and removal/cleanup consumables. | $3,000 |
Eight column footingsFooting concrete, setup materials, temporary bracing, and post-setting hardware. | $500 |
Timber frameEight main columns, perimeter beams, sloping roof members, blocking, central-opening framing, and temporary braces. | $2,500 |
Roof and passive ventSheathing, underlayment, shingles, flashing, edge details, fastening hardware, and trim for the raised roof. | $3,200 |
Paint and exterior finishExterior primer and white paint, caulk/sealant, brushes, rollers, and preparation supplies. | $550 |
Final exterior floor tileOutdoor stone-look finish, exterior mortar, joint material, sealer, and cutting tools. | $3,500 |
Other equipment, delivery and consumablesMixing and finishing equipment, cutting/fastening tools, hauling, hand tools, protective equipment, miscellaneous supplies, and waste allowance. | $2,550 |
| Approximate total | $22,000 |
What I learned
A finished version is not the final version.
I learned to connect a design decision to how a place is actually used. A carefully laid floor alone did not solve weather exposure. A roof added shelter, but open sides still left wind-driven rain to address.
Building with my father also made the work collaborative in a practical way: we had to align, brace, check, and adjust before moving on. The result matters to me because it is both something we built together and somewhere people can gather.
Continue exploring.
← Back to Selected Builds